One of my winter garden chores is to re-do my Jerusalem Artichoke beds. After twelve years of triple digit summers, the plastic planters have started disintegrating. I’ve also been lazy about harvesting them as often as I should which has resulted in crowded planters. So, Jerusalem artichokes have been on the menu more often than not! Usually, I simply slice them raw into our green salads. They are a sweet crunchy addition, a bit like a carrot, and work well during the winter months.
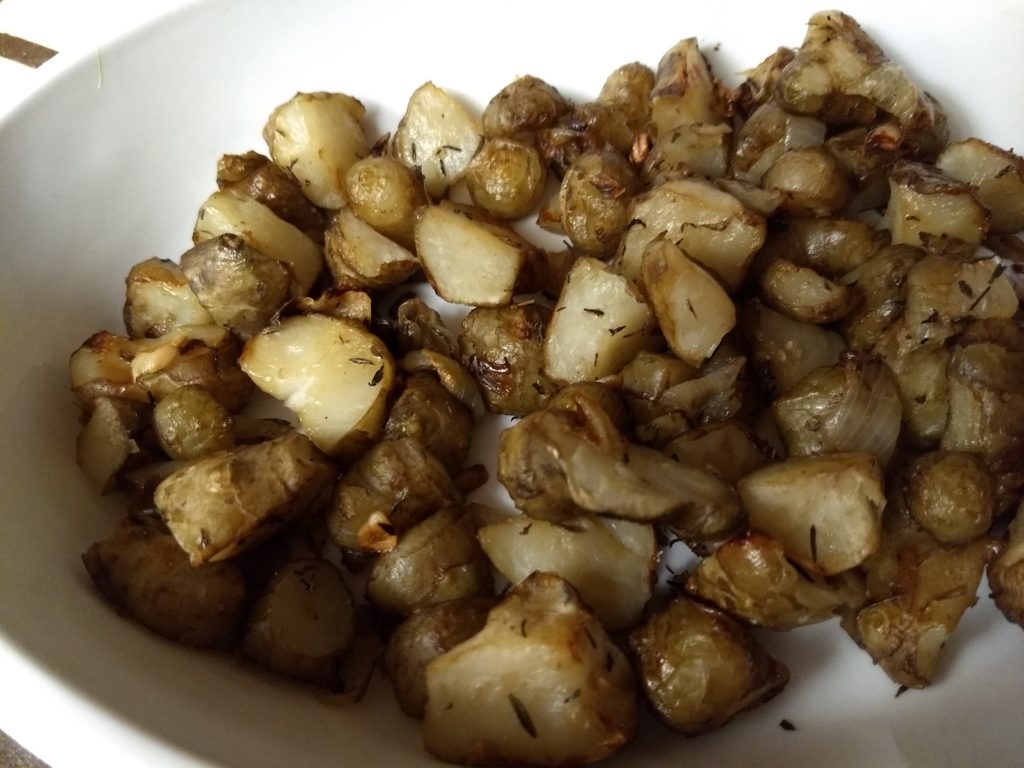
Last night, I roasted the sunchokes pictured above with garlic (from the garden), 1/2 of a chopped yellow onion, salt, pepper, and thyme. My husband was a bit surprised at the first bite – he thought he was eating a potato! But once he adjusted his expectations, he put a dent in his portion!
Roasted Jerusalem Artichokes
Directions:
Scrub the Jerusalem Artichokes/ Sunchokes and remove any dark spots. Cut into uniform pieces. In a roasting pan combine Jerusalem Artichokes, fresh chopped garlic cloves or powder, 1/2 of a chopped onion, and seasonings of your choice – I used salt, pepper, and thyme. You can also toss them in olive oil if you prefer. We avoid oil in our house. Roast at 400 for 45 minutes, stirring halfway through. You can also use an air fryer to make them extra crispy although I’ve found I get the best results if I boil them first. Enjoy!
We’ve been harvesting and eating so many cucumbers, I haven’t bothered posting about it. Today I picked enough to make some spicy garlic dill slices for sandwiches. I used the recipe found here .
The only change I made was to add 1/8 teaspoon of pickle crisp to each of the 4 pints. I don’t like adding chemicals to our food but I also know that my family won’t eat pickles unless they are crisp!
They are off to a cool, dark place to finish bathing in seasoning. I’ll let you know how they turn out in a few weeks.
For those who know me, a recipe is merely a starting point. This dressing is no exception. Every year at this time, I’m drowning in fresh basil. So, every year at this time, I make enough pesto to feed an army and freeze it. The problem? We don’t eat all that much pesto so it was time to find another use for all of our basil.
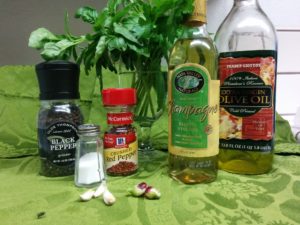
This dressing is the answer! I did a search for “Basil Vinaigrette” recipes and came up with several recipes that sounded delicious. Then, I did what I always do, I improvised! This “recipe” is perfect for using whatever you happen to have growing in your yard on the day you need it. Most recipes call for 1/4 cup or more of olive oil. We try to limit our oil intake, so this only calls for 1 tablespoon of oil. But if you want more, slop in more! Consider this merely a guideline to your own salad dressing adventures!
Ingredients: Fresh Basil – 1 to 2 cups Fresh Parsley – 10 leaves or to taste Vinegar (your choice) – 2 to 5 tablespoons Olive Oil (or not) – none to 1/2 cup Pepper – to taste Red Pepper Flakes – to taste Salt – to taste Fresh Garlic – at least one clove (live dangerously – add more!) Onion – Whatever you have! I’m using Egyptian Walking Onion Bulblets
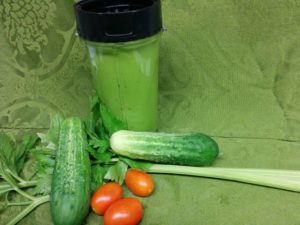
Directions: Throw all ingredients into a blender. I use the smoothie cup from my Ninja. Blend, taste, add more seasonings if needed, blend again, dump on your salad. I’m guessing that because of the vinegar, this will last at least three days in your refrigerator. I usually just make enough for one meal at a time but then, we eat really BIG salads!
I plan on experimenting with a basil tarragon dressing to use on chicken salad. Stay tuned to find out how that variation goes!
Tonight’s dressing along with some other vegetables picked from the garden for our nightly salad.
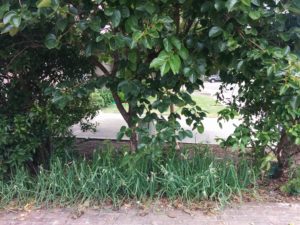
A bed of unruly Egyptian Walking Onions – left to fend for themselves for a season (or two!)
Several years ago, I bartered some seeds with a gardener in Washington State for some Egyptian Walking Onion bulblets. I have them growing here and there in odd corners of the yard, but their main bed is in a narrow area that borders the driveway in the front yard. As you can tell, they share the bed with three fruit trees from left to right – an orange, a persimmon, and a tangerine. I planted them and have pretty much ignored them and yet, they prosper! Definitely my kind of plant. And although they are recommended for full sun, they seem quite happy in the filtered sun they get through the canopy of the fruit trees. I’m guessing they are especially happy for that filtered light when we get several triple digit days in a row during our Summer months!
Here in Central California, Egyptian Walking Onions are a perennial. I mainly treat them as green onion, although I’ve heard you can pickle the tiny little red bulblets. But honestly, who has time to laboriously peel the cute little things?!? This year, I absolutely had to pay them some attention. The bed is far too densely planted but not because of any help on my part! They freely multiply themselves – consider them the allium version of a tribble.
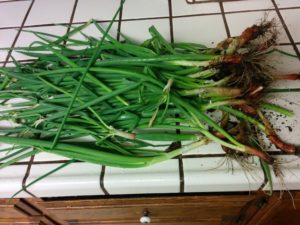
So, what to do with the things? I gathered an armful and headed to the kitchen.
An armful of unwashed Egyptian Walking onions.
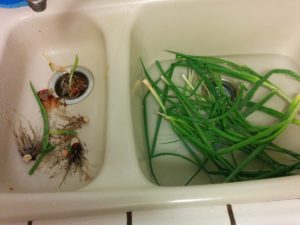
First they needed to be cleaned and sorted:
A two-sided sink is useful for this task. Make sure the trimmings are on the side with the garbage disposal so you can quickly dispose of unwanted creepy crawlies! (Not to worry. No ladybugs were harmed during the cleaning of these onions!)
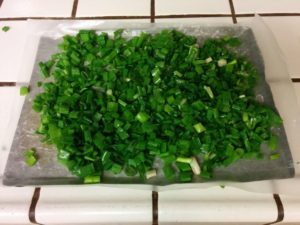
Cleaned and sorted!
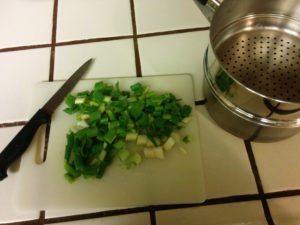
To the left are the smaller, most tender shoots which I finely chopped and stored for use on our daily green salads for the week. In the middle are the tougher, older shoots. While these can be used as fresh green onions, they are stronger tasting and tougher to chew, so I tend to chop these and freeze them for use in casseroles, scrambled eggs, and stews. I like to have at least a gallon or two in the freezer for this purpose. To the far right are the “bulbs” and the tougher green stems. They are slender like a shallot but I feel they really need to be cooked to be edible. While you can freeze them to help break down the fibers, I like to quickly blanch them, throw them in the dehydrator, and then grind them up to use as powdered onions.
The tougher sections off to the steamer to be blanched before hitting the dehydrator.
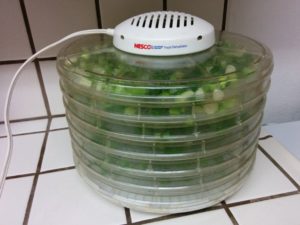
Out of the steamer and into the dehydrator!
The armful I cleaned today allows for about two trays of the white ends, and then the remaining trays were filled with unblanched sections of greens from the middle section. What doesn’t fit in the dehydrator heads off to the freezer:
Flavor for the coming Winter’s soups!
Dehydrated onions pulverized in a coffee grinder used exclusively for spices.
The dehydrated onions from 2 weeks ago finally made it to the coffee grinder I reserve exclusively for spices. Six cups of dehydrated onions make about one cup of powdered onions. I love using this powder in my homemade ranch dressing and my spinach dip, but it does lose it’s potency after about six months so grind it in small amounts and store it in a dark cupboard. My suggestion is to grind up what you can use in that time and store the remaining dehydrated onions without grinding them. They will last about two years if stored in a cool, dark cupboard.
Now, time to rinse and repeat the above process about 5 more times!
Closing tips:
By the way, the green lid on top of the jar is from a parmesan cheese container. The screw on lid will fit the top of a small mouth canning jar and has two tabs: one for shaking product out and one for pouring large amounts. These lids are perfect for spices!
Also, please note the classy painter’s tape label on my jar. I sterilize and reuse my jars over and over. I even have jars that belonged to my Grandmother! But one thing that drives me absolutely bonkers are adhesive labels that won’t wash off. Painter’s tape peels right off with no scrubbing. Perfect for someone who doesn’t want to spend hours with a scrub brush and a bottle of Goo Gone!